CLICK HERE FOR FREE BLOGGER TEMPLATES, LINK BUTTONS AND MORE! »
Showing posts with label Rule Release 10. Show all posts

Monday, January 2, 2012

9 and 10 done - The Quilted Barn

I am finding some time to catch up -- yippee!  I am only three behind now.

The first row was added to the bottom of the quilt.  Different sized blocks that fit together are in the barn section while the orange flowers are 3D.

The very bottom row has the folded insert technique.  I did it very simple by folding the green strip of fabric on the bottom right and catching the edges in the seam.  I appliqued the fold down.  The disappearing 9 patch is in the front of the lower red barn.  I sewed the disappearing pieces together at random with no specific rhyme or reason.

Now I am off to making a bridge and horse/buggy to begin my column.

Oh, I finally got all of my itty bitty flowers attached to the fence between the two big trees.  They are a bit busy, but I like it.

I also added three small trees below the "falling apart" old barn on the left.
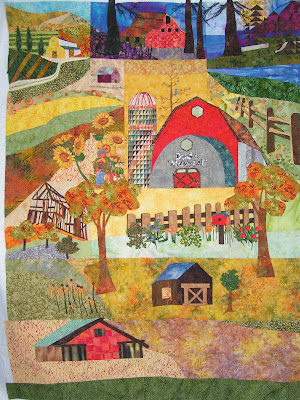
Below is a close up of the two newest rows.

Below are closeups of the flowers.  The whole flower section was made by putting fusible webbing on the back side of the fabric, fusing it to itself, and then cutting out the flowers.  The front and back of the flowers are the same fabric.  Most were attached with a French knot, but some I used invisible thread.

Saturday, November 5, 2011

Marie's Optical Illusion Rule #10

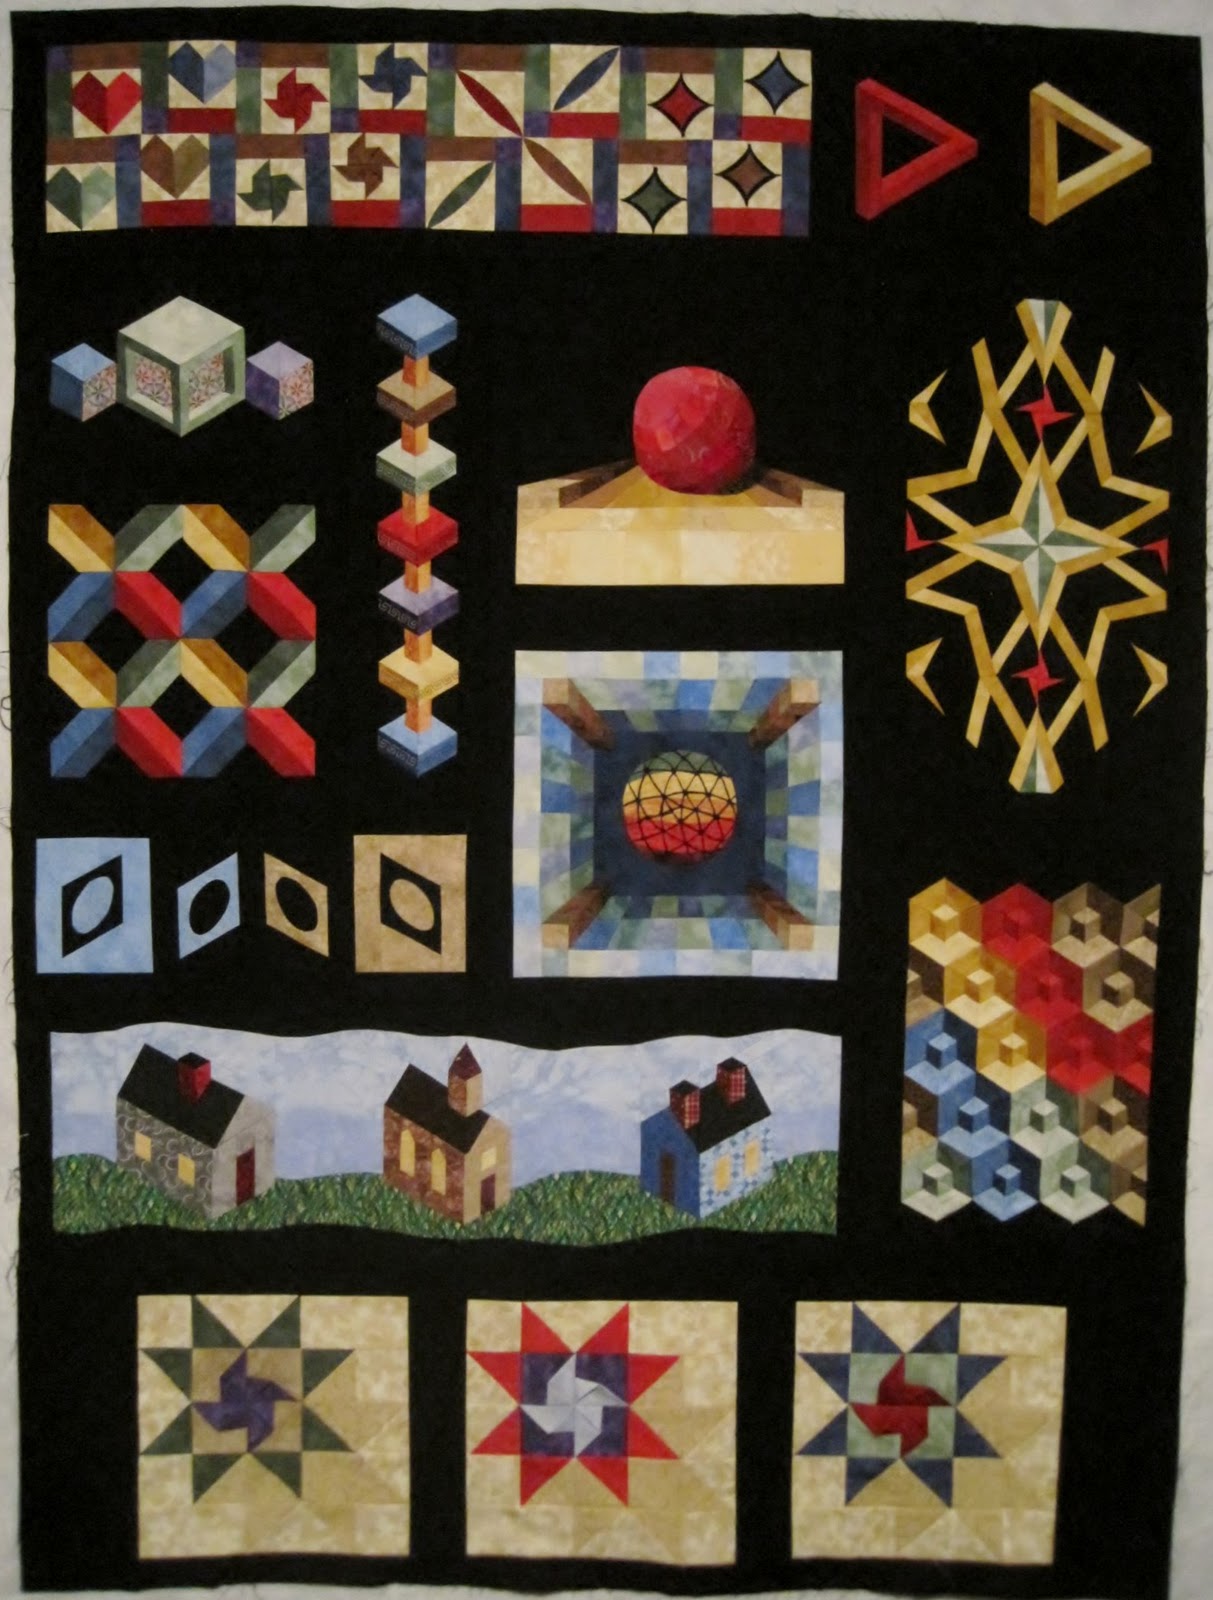
I'm so happy to finish another rule.  Now I'm only 2 months behind!  Rule #10 is 4 disappearing 9 patches.  The technique was to use a folded insert.  I've never made d9p before, and they were really fun.   I combined the folded insert with the d9p's. 

I really had fun making this (faux) cathedral windows block.


 I don't know what to call this block.  It's rather different, but it is a d9p and it has fabric folds.

I used folded pinwheels in my last rule, and decided to put some in this one too.


Here are my 4 d9p pieced together.  The hearts aren't folded, but they fit my optical illusion theme.


I added the 3-d continuous triangles because I thought I needed  more optical illusions.


Here is the whole quilt, just waiting for me to finish the next rules.

Monday, October 17, 2011

Rule 10 - Use It Up #2, and "Use It Up #1" top


I've actually managed to get some quilting time in these last few days....woohoo! Should have been working on homework or the commissioned sewing, but needed the quilting time for me. =)

At any rate, since I had decided that the pastel quilt was big enough for what I wanted to do with it, I stayed with my theme and started working on "Use It Up" quilt #2. =) This quilt top is starting with a pair of pillow panels that I've had in the stash for at least 10 years. I'd planned on using them for a baby quilt....so I figure by following the remaining rules, with the exception of maybe the posted sizes for the sections, I should have another nice baby quilt at the end of this mystery.

I've finished Rule 10 - because of teh size of the pillow panels, I was only able to get 3 of teh disappearing 9 patch blocks in the quilt on the left side of the quilt. Had goofed up on my cutting so the 4th block didn't turn out anyway. I added the folded insert blocks along the bottom of the top in progress. Now onto Rule 11. =)

Meanwhile, I've also managed to get a border onto the pastel quilt and that top is now finished. Eventually it'll get quilted whenever I next need a baby quilt for a girl.


Wednesday, October 12, 2011

Country Holiday Traditions


I can say one thing about this Mystery quilt....it truly is just that, a mystery that unfolds and leads down different paths with each new rule and technique. I have been playing catch up, but I can tell you that this project hasn't turned out like anything I had envisioned in the beginning.

Here are my rules #9 and #10. Number 9 was to add something 3D, if you look close the wings on my chickens are 3D. Number 10 is a disappearing nine patch and a folded insert. My sunflower garden is the nine patch and the leaves are my folded inserts. The leaves are beginning of my fall holiday traditions.

I knew at the start of the quilt, I wanted to have the holiday traditions surrounding a home, but I didn't anticipate all that I've added around the home. This project has really stretched me. I'm loving all I'm learning. It is a simple, but the disappearing nine patch was fun to do. I like the possibilities that can be done with it.

Friday, October 7, 2011

Lyn's Small Town Winter

I am posting this for her as she doesn't do blogger.  Lyn has completed and added rules 8, 9 & 10. 

Rule 8 is the block with the yellow house, brown tree, and rock piller fence posts placed in the lower right.

Rule 9 features more of the lake, the mountain behind it, pine trees, and embroidery work so show more backgrouond hills.  For the 3-D portion of the rule she added black colored birds flying above the pine tree on the right.

On rule 10 she tried to do the disappearing 9 patch in the sky and then changed it because it looked too boxy for clouds and sky.  She did the folded inserts on her clouds.  They are difficult to tell that they are folded inserts because she did such a fine job of stitching down the fold, but they are the long skinny clouds.  Don't they look great and oh so clever?

Thursday, September 22, 2011

Scarecrow rule 10

I have put rule 10 together.  I made the D9P small.  I started with 2" squares so that 4 blocks would fit into the 9.5" area.  Of course that was a little bit too small so I just added borders around it.  I am getting so I can make things fit!  lol.  The d9p blocks are to the right and next to it is my folded insert.  That is the block made entirely with folded fabrics and sewn around the edges of the block to hold it all together.  Yes,  the edges are kinda thick.   I had a piece of the curved pieced strip left over from a previous rule so I machine embroidered a scarecrow on it and made good use of it.  The other two blocks have machine embroider/applique scarecrows and the fence is also embroidered.  Near the middle is  fussy cut (2 pieces) of fabric sewn together.   Next thing I need to do is sew it to the quilt and get busy on #11.

Thursday, September 1, 2011

Birds Rule 10 Reveal

Here is my finished rule 10. I loved working with the D9P. I'd never seen that technique before and think I may well use it on my next baby quilt. It's amazing how simple and yet beautiful it is. I did my whole block with it and used four and a half 9 patches. I made my folded insert an integral part of the 9 patch and created abstract flying birds from that. I really like the outcome.


I added the finished block to the bottom of the quilt and really like the way it looks. I still need to do something on the right side to balance out the dark blocks on the left, but I'm sure something will come up that works for that. Can't wait for the next rule.


Autumn Country Rule 10 Reveal

Reveal Day!
This has been a really fun rule. The D9P's are a fun and easy way to take up space. I used many of my scraps, sew it is really scrappy. I put 2 sets on each side of my "windows"
The quilt is getting so big that it is hard to get a good close-up view, but you can see that it does not follow what I have been doing with a scene. I think this will be the bottom of the quilt, so it does not need to be scenery.
It is definitely bright and "autumny".

Tuesday, August 30, 2011

Rule Ten - reveal

I used 5" squares to make the 4 D9P. When I cut them apart, they made a nice row across the top. Those 9-patches definitely disappeared! I just realized that it didn't work as well as I thought. In reality, I only used 2 9-patches. I still have two 9-patches cut but left over. Oh well.....I DID try! LOL
All the rules sewn together.

Rule #10 Tease

I used Ricky Timm's one seam flying geese with a folded rectangle. Then I turned the edges and stitched them down.
I still can't post comments. I have tried signing in and out many times. I really like what everyone has done so far. I can't wait to see the finished gallery of pics.

Tuesday, August 16, 2011

Autumn Country teaser Rule 10

This rule is SEW fun!!! Hardest part is trying to decide what to put where!

Monday, August 15, 2011

#10 Teaser


Here is my teaser. Doesn't tell you much. It's just the first step in both the rule and the technique. Another fun one! (Just a note, the blue flowers are my ironing board cover not part of the block.)


Monday, August 8, 2011

Rule Release #10

RULE: Make four disappearing 9 patches 
What is a D9P?  Here are some links to help you:

joscountryjunction tutorial
amysorensen disappearing-nine-patch-tutorial
youtube tutorial


TECHNIQUE:  Use a folded insert technique.  See explanation at the very bottom of this post.


SIZE:  At this point our quilts should measure 43-1/2" wide and  49-1/2" tall.  Block # 10 should be 9" finished (9-1/2" unfinished) tall and fit the full width of the quilt (43-1/2" wide).  We will place it on the top or bottom of the quilt.   This should help in getting it rectangular shaped for the top of a bed.


When the block is finished post a picture of the block, then sew it to the top or bottom of your quilt and post a picture of the whole quilt.


DUE DATE:  We will have one month to complete this block.  You may begin posting teasers Aug 15, and the full release can be posted on Sept 1st.  The next rule will be released September 8. 


Deana's Folded Insert Technique Tutorial

Basically a folded insert is a technique where you fold the fabric and catch the raw unfolded edges in a seam.  The folded edge can then be curved back for great new look.  You can jazz up any traditional block that has a half square triangle in it with this technique.  Here is how.

I began by cutting squares - any size works.

Next I folded my "inserts" in half to form a pressed triangle.

Next I placed them on top of squares of the same size and sewed the block together catching the raw edges of the folded insert in the seams.


The next step is to curve back the folded part and hand or machine stitch it down.  (Mine are just pinned for demonstration).


This gives the half square triangle a nice curved look.
If you place two folded triangles over one square, you can create a beautiful oval opening like the one shown in the photo below.


Here are some pictures of other blocks that are made with this technique.  Note that they are simple traditional blocks with half square triangles in them.


There are many many other ways to use this technique that do not use half square tringles.  Someone could use a folded insert to make a beak or wing on a bird, a window on a house, the sky is the limit!!Some other ways to use this technique are demonstrated in the links below.

phillipsfiberart compass video

Fabric-Origami-Quilt-Block

Cathedral Windows Tutorial