.JPG)


I am super and woefully behind in our mystery. Hopefully when tax season ends and my hubby is back to soemwhat manageable hours, I can get back to sewing. I love seeing what you all are accomplishing! Everyone's work looks fabulous.
~Carrie
Tuesday, April 12, 2011

Monday, April 11, 2011
Stephanie's nerdy teaser

Enjoy working on all of yours!
Sunday, April 10, 2011
Granny Annie's Garden Rule 5


To the left is my Rule 5 and to the right is Granny Annie's Garden now.
I'm not sure where I'll go from here. I joined the Dorinda challenge to commit to doing techniques I would not normally do. I have no need for an appliqued bedsize quilt. I love what I've done so far & think it would make a great wall quilt (I have just the right spot for it too!) I may do that but continue to complete each rule making mini quilts or combining a few into another wall quilt. I need to think on it all a little more. Sure is fun though! We'll see..........
Friday, April 8, 2011

Wednesday, April 6, 2011
Once late always late..#5

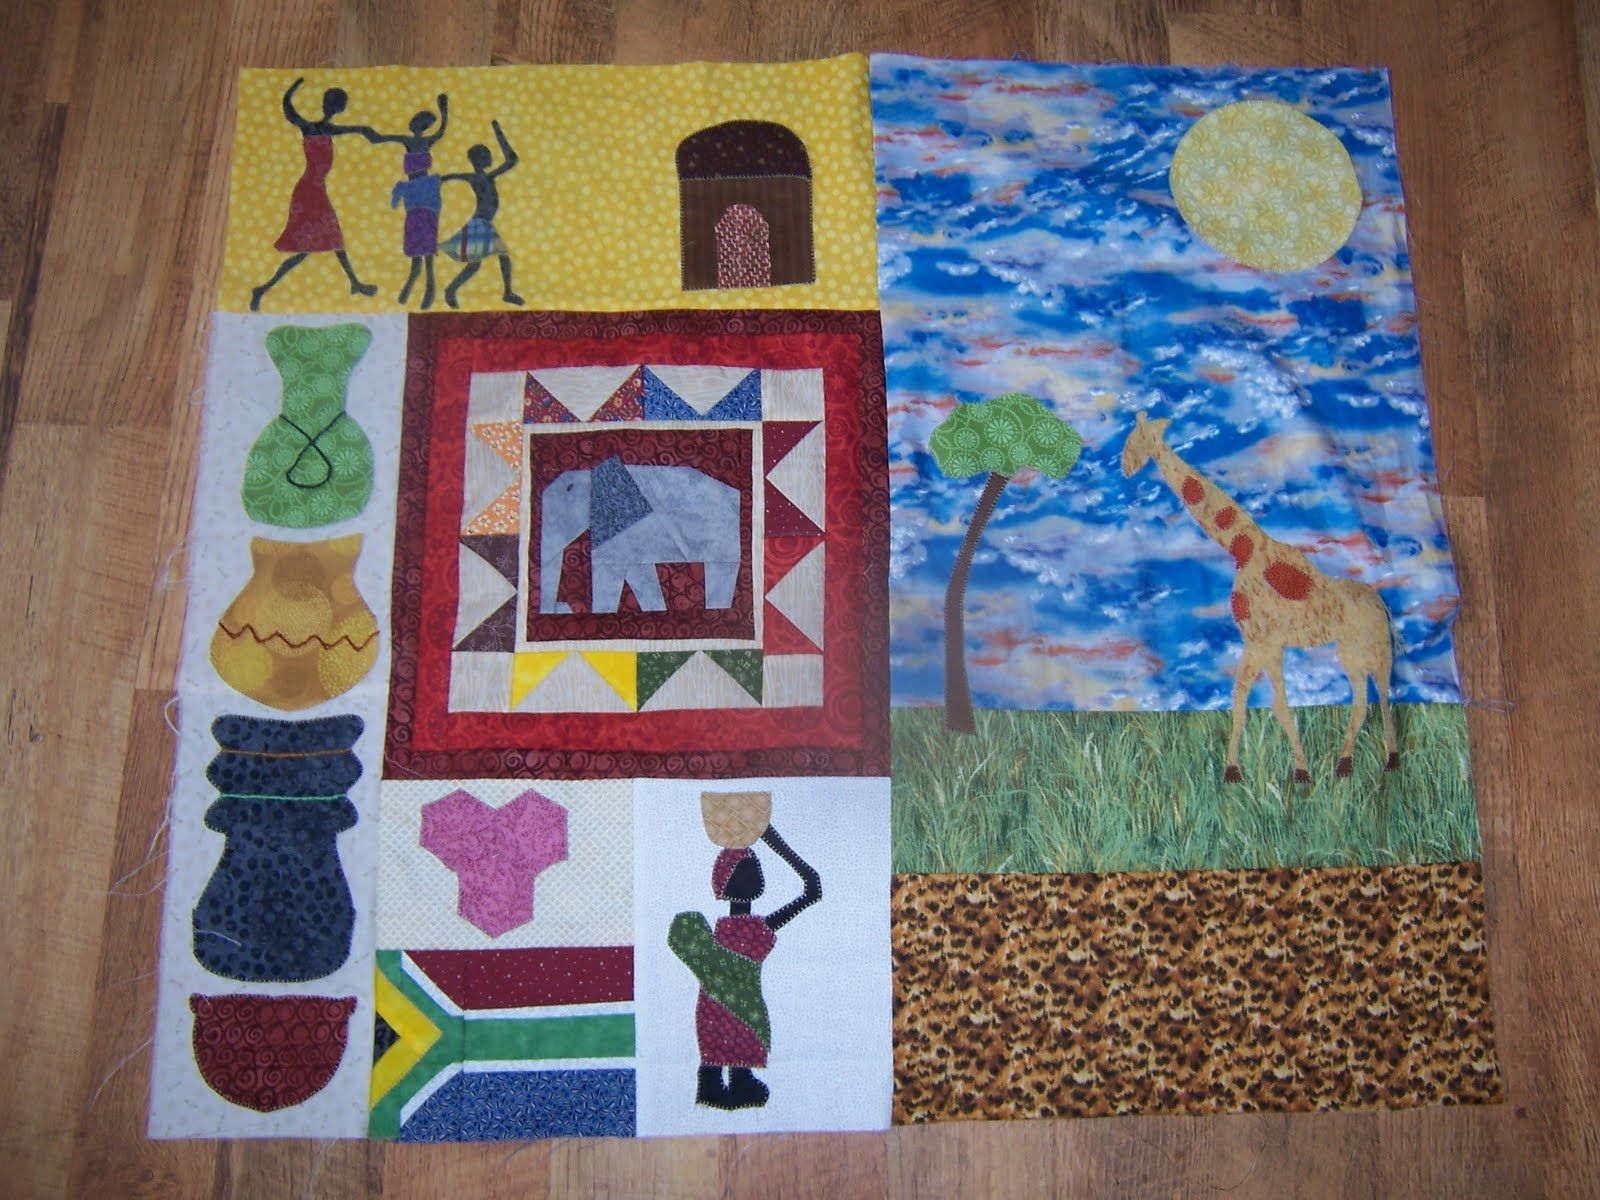
So I had a hard time getting excited about this one.. I cheated again.... I didn't machine piece my circle (but at least I included one). I tried the machine freestyle embroidery with the tail of the giraffe. Dont look too close though its pretty scary looking. Lets see how late I am going to be with the next rule... Bets anyone?
Teaser, Rule #6

I'm not finished with this block, but I couldn't resist posting a teaser because I love this free motion piecing technique! It's fun, fun, fun!
Autumn Country Rule 6 Teaser
Here is my first teaser, and all I have done so far.

I'll bet you can guess what it is! Heh, heh.
Tuesday, April 5, 2011
Still a Mystery: Barns
I wanted to show my progress and explain why it isn't done. I've finished building "Bud's Moo-tel", but have way too many ideas for the upper half of the new section. Some barn details and some foilage/trees will be thread-painted in once the section is complete. The circle is the part that I have too many ideas for. I originally planned to have a setting (or rising) sun over the trees on the top right. My new idea is to have a day sun over some mountains brightening some fields in the distance behind the red barn. I have even contemplated doing a large circular section with an entirely new scene in it.
Sorry I'm so indecisive, but the mystery, even for me, is still the best part of the journey.

Monday, April 4, 2011
Rule Release #6
SIZE: 10 1/2" tall by 31 1/2" wide to be added to the TOP or BOTTOM of the quilt (block finishes at 10 x 31).
RULE: "Place a house or cabin that fits your theme in the block, not a log cabin block but an actual building"
TECHNIQUE: Free style machine curved piecing
This technique is not as hard as it looks so give it a try. A free-style curve means that you just take the rotary cutter and cut a gentle curve WITHOUT a pattern (just free-hand it). Here is a tutorial link:
Sara Fielke
How to pin and sew a curve:
Kaffe Fassett shows you how to pin and sew a curve (not free-style though).
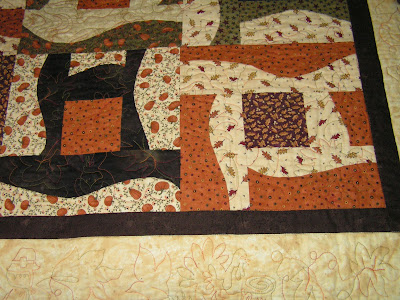
Here are a couple of example pictures of some projects I have made with free handed curved piecing.
This one is put together log-cabin style, but the logs are two pieces of fabric that were free-style curve pieced first. This quilt was one of my favorites to make because it was just so fun.

DUE DATES:
-Post a teaser anytime and as many times as you like before Apr 15th.
-We would love for ALL to post something before then because it keeps us excited and gets us all started on the block.
-A completed photo can be released beginning on (Friday) April 15th.
-Final due date and rule #7 release date (Mon) May 2.
RULE: "Place a house or cabin that fits your theme in the block, not a log cabin block but an actual building"
TECHNIQUE: Free style machine curved piecing
This technique is not as hard as it looks so give it a try. A free-style curve means that you just take the rotary cutter and cut a gentle curve WITHOUT a pattern (just free-hand it). Here is a tutorial link:
Sara Fielke
How to pin and sew a curve:
Kaffe Fassett shows you how to pin and sew a curve (not free-style though).
Here are a couple of example pictures of some projects I have made with free handed curved piecing.
This one is put together log-cabin style, but the logs are two pieces of fabric that were free-style curve pieced first. This quilt was one of my favorites to make because it was just so fun.

The borders on these little "minis" were free-style curve pieced. Notice that the purple one and the pink one are not identical. It is because they are done free-style.

Below is a link where another free-style curved technique may have been used to piece a sunset behind a mountain range. It has a tree in the foreground.
DUE DATES:
-Post a teaser anytime and as many times as you like before Apr 15th.
-We would love for ALL to post something before then because it keeps us excited and gets us all started on the block.
-A completed photo can be released beginning on (Friday) April 15th.
-Final due date and rule #7 release date (Mon) May 2.
Sunday, April 3, 2011
A lot of catching up to do
I was sick all this week. I, who am never sick and am absolutely the worst patient in the world, was really, really sick. So Rule 5 is done except for the embroidery part. I had a hard time with this one because it didn't seem to fit the Civil War theme, but I think I've figured out something that makes it work okay. We'll see when I finish it in the next couple of days and get it posted. No ink yet, because I was sick, but I'll catch up everything, and hope rule 6 doesn't throw something at me that I have as much trouble with as piecing circles - definitely something I've never desired to do and hope never to do again. LOL!
Tuesday, March 29, 2011
Betty's scarecrow 5

I bought the April/May issue of the Quilter Magazine. It has a patten for the branch with the birdnest. It turns out is was too large for my block so I sketched it smaller. I hope that isn't illegal. I am giving the magazine credit for the design and I am enjoying the rest of the magazine!

I have sewn my two sections together. I edited my post so I could stick the picture in.
Bird Block #5
I'm finally back home, so here is my finished block 5! It's getting harder and harder to get a good, undistorted picture. I had to stand this up on the back of the recliner to get the right angle on it!
 As you can see, the circle is the hole in the birdhouse. The free motion embroidery is the twigs. I was planning to do the leaves in free motion embroidery too, but I had so much trouble that I gave up and just machine appliqued and embroidered them. The birds are from a Pam Bono design using a diagonal corner technique. I'm really happy with them!
 Here is everything put together. I gave up trying to get a good angle. Since you've already seen all the individual parts, I didn't worry about trying to get it square in the photo. Can't wait for the next rule!!
 As you can see, the circle is the hole in the birdhouse. The free motion embroidery is the twigs. I was planning to do the leaves in free motion embroidery too, but I had so much trouble that I gave up and just machine appliqued and embroidered them. The birds are from a Pam Bono design using a diagonal corner technique. I'm really happy with them!
 Here is everything put together. I gave up trying to get a good angle. Since you've already seen all the individual parts, I didn't worry about trying to get it square in the photo. Can't wait for the next rule!!

Sunday, March 27, 2011
Pam's Woods Mystery Rule #5

I will post my tease first even though I am late with it.
This is the sewn circle. I really had to think about this one. This has been exciting.


This is the sewn circle. I really had to think about this one. This has been exciting.

I did the thread painting on the sewn circle. I don't know how well you can see it in the pic.

Here is my rule #5 completed. I also did some thread painting with smoke coming out of the chimney. It shows up a little better than the yellow on the circle.

This is all of my rules combined. It was a little scary for me to add the blue for the sky, but I am now glad that I have done it. It will give me a little more liberty on the rest of the blocks and might be able to put some water or a stream in there now.
Thanks again to the daughters of Dorinda for hosting this fantastic mystery. Also, thank you to everyone who is posting their blocks. I get so excited everytime I see a new one. Everyone's quilts are going to be so wonderful.
Thursday, March 24, 2011
Moira's Rule 5

 Here is my completed rule 5 block. The two topmost balloons were the ones that were pieced. All of the other balloons are fusible applique. My free motion embroidery are the strings tied to the balloons. =) the block was added to the left side of the quilt so far.
 I plan to add a couple of butterflies to the quilt yet an will overlap them over several of the blocks already made.
Desertsky Susan - Rule 4
I can only go this far until my printer has ink, which won't be until after the first of April - no joke. So here's the block, minus pictures of Lincoln and Mary Todd in positive-negative frames on either side of the flowers. I chose a fabric I thought might resemble the wallpapers of the time, and made a bookshelf across the block. The vase is needle-turn applique and the flowers are broderie perse with a small machine blanket stitch.

<center>

<center>
Autumn Country Rule 5 Full Release
When this rule was released, I knew what I wanted to do. The river from the last block was the perfect segway to the idea. The next thing was deciding how to do it. I first cut a piece of freezer paper the size of the rule and roughly drew in my idea. Then I googled pictures and found the one I liked best and with my ruler and a cup, drew the sawmill onto the paper. I put in the trees and the bridge very roughly, and then went through my patterns and fabric to see what would work. I made the first circle using one of the ideas from the links on the release, and made the second one using a different link. They both turned out to look the same. Overlapping them worked very easily, and then I put up the walls. This fabric looks like rocks, but is so pale that it barely shows up at all. I fashioned the roof and appliqued it on, then satin stitched the paddles. When I attached it to the river, it looked strange, so I used a smocking stitch to make waves, so the fabric bunches a little, but the tucks smooth it to the opposite riverbank.
 I made the first circle using one of the ideas from the links on the release, and made the second one using a different link. They both turned out to look the same. Overlapping them worked very easily, and then I put up the walls. This fabric looks like rocks, but is so pale that it barely shows up at all. I fashioned the roof and appliqued it on, then satin stitched the paddles. When I attached it to the river, it looked strange, so I used a smocking stitch to make waves, so the fabric bunches a little, but the tucks smooth it to the opposite riverbank.
  The little trees above the river are done with the free-motion embroidery, and the large trees are done the same as the trees in rule #3. The pine trees are paper-pieced and I staggered their placement like those in rule #1. So I used lots of techniques to put this together.
 And here are all 5 blocks together. I have some rough ideas where to go with future blocks, but will have to see what the rules are, in order to pull it off.
This is so much fun. I am having a blast creating this picture. And that is what it is turning out to be, a picture.
Full Rule #5
Here it is!

These dimensions seemed very large to me, but all the more space to be creative with! I really enjoyed learning this circle technique. But my machine hated the embroidery thing. It is an embroidery machine, but usually you program the design into the computer and then it does it itself, so I guess it just didn;t like me doing the work for it. Here is a close up of my circles, and the embroidery.


And the whole thing...
 It's starting to look like a good sized wall-hanging. I like it a lot. It's not my usual style, but I do like it. And yes, I did move the number four block, I couldn't sleep cause of where it was.

These dimensions seemed very large to me, but all the more space to be creative with! I really enjoyed learning this circle technique. But my machine hated the embroidery thing. It is an embroidery machine, but usually you program the design into the computer and then it does it itself, so I guess it just didn;t like me doing the work for it. Here is a close up of my circles, and the embroidery.


And the whole thing...

Wednesday, March 23, 2011
Granny Annie's Garden Rule 5 Tease

I'm posting my circle as my tease. It will only be 1/3 of my whole Block 5 but it's going to take me forever to finish the block as that is alot of space to cover. First time I've ever sewn a pieced circle - not perfect but I'm happy with it.
Tuesday, March 22, 2011
Marie's Block #5 Teaser
I haven't made much progress on my Block #5 yet, but here a teaser of what I have done so far. I'm still in the drawing stage. I'd better get busy--it's going to take me a while to finish this block.

Sunday, March 20, 2011
Barn teaser #5
Not a single stitch yet, but a paper-pieced pattern is sketched. I have also laid out some of the fabrics I have selected. Oops, cut some off the top. If you look closely, you'll see words that are written in mirror image. I will copy this pattern onto overhead sheets and then flip the sheets over to make a reverse copy for the paper pieced pattern.

I have decided what to do with the circle, but haven't sketched it yet. I still have several inches to the right that need to be designed on this one. No idea yet on the free motion embroidery part.
Saturday, March 19, 2011
Deana's #4 Barn COMPLETE
I finally "got 'er done". The front of the barn uses a square-in-a-square pattern of positive negative. It is subtle, but it is there. I think it gives the effect of shadows and worn paint. The trees were hand appliqued using the freezer paper on bottom method. I also appliqued the third window in the row because I forgot to use black in the center of my square-in-a-square block there to form the window. I may add some shadowy branches later. I'll cut the tops off once I do the next block that goes on top.


The next pictures gives you a closer view of the underbrush. You can see that it is just basted down. I caught the edges in the seam when I attached it to the main barn block. I used steam-a-seam on two pieces of the same fabric, peeled off the paper, and then stuck them to each other (wrong sides together). They will be permanently stitched down in the quilting phase. I think they show depth and the purple Batik behind them looks like shadows of them dancing in the moonlight.

My favorite part of this block is the night sky. It is made from a piece I hand-dyed with Dharma proactive dyes a few years back.

Friday, March 18, 2011
HELP ideas
I know of two ladies who are struggling with the free motion embroidery thing. If your thread is looping on the bottom, tighten your tension. The reverse is also true.
One thing that has seemed to really help is stabilizer on the back of your project. I use plain old paper and it works well. I just rip it off when I'm done.
One lady couldn't get the foot under the hoop so she took the foot off, slid the hooped project under the needle, then reattached the foot. You can also do this without a foot at all.
Everyone is free to offer advice or what works for them.
One thing that has seemed to really help is stabilizer on the back of your project. I use plain old paper and it works well. I just rip it off when I'm done.
One lady couldn't get the foot under the hoop so she took the foot off, slid the hooped project under the needle, then reattached the foot. You can also do this without a foot at all.
Everyone is free to offer advice or what works for them.
Bird Teaser, Rule #5
I don't have my block done yet. This has been a difficult one for me. However, I am going out of town for over a week and wanted to have something to post, so here it is. Sorry that I didn't get it pressed. I didn't notice until I had the picture taken, and time is too short to press it and take another one. But here is the teaser.
 I found the free motion embroidery very hard. My machine just doesn't like it at all. After the thread broke for about the umpteenth time, I changed the plan and didn't do as much of that as I had planned. None of it shows on the teaser, but that's just as well. It isn't very attractive!
 I found the free motion embroidery very hard. My machine just doesn't like it at all. After the thread broke for about the umpteenth time, I changed the plan and didn't do as much of that as I had planned. None of it shows on the teaser, but that's just as well. It isn't very attractive!
Subscribe to:
Posts (Atom)